Fresh paint can lift a room, yet the join between two colours often betrays the effort. A crisp line signals care, discipline and intent. A fuzzy edge distracts the eye and can shrink a space visually. The fix does not demand artisan tools. It does demand a plan and a precise moment.
Why a clean divide changes a room
Statement walls, two-tone panelling and colour blocking have moved from magazines to terraces and semis. A neat boundary amplifies these choices. It lets darker tones frame lighter ones. It elongates ceilings and anchors furniture. It makes skirting and cornices look straighter than they are.
Ragged borders break the illusion. The mind spots irregularity faster than it reads a colour. The result looks rushed, even when you spent a weekend sanding and filling. Families notice it in evening light. Guests see it at the doorway. The fix sits at the edge, not in the middle of the wall.
Common mistakes that blur the line
Freehand cutting-in with a loaded brush invites runs. Low-grade masking tape lets thin paint creep under it. Stretching tape while you apply it causes it to lift back at corners. Letting paint fully cure before removal tears the film and chips the basecoat.
Small choices compound: the wrong tape, a wavy reference line, a heavy roller, and a late peel add up to a fuzzy border.
The kit that keeps paint in its lane
Good edges start before the first dip in the tray. Walls need to be clean, sound and dry. Pick tape for the surface, not just the price.
| Tape type | Best for | Typical width | Safe removal window |
|---|---|---|---|
| Delicate-surface, low-tack | Fresh paint (over 24–48 hours old), plaster, lining paper | 24–36 mm | Up to 60 days indoors |
| Multi-surface, medium-tack | Old emulsion, sealed wood, primed skirting | 24–48 mm | Up to 14 days indoors |
| Textured/elastic | Lightly textured walls, gentle curves, slight relief | 36–48 mm | Up to 7 days indoors |
| Sharp-edge/paint-block polymer | Ultra-crisp lines on smooth walls with thin acrylics | 24–36 mm | Check pack; often 7–21 days |
Setting the line dead straight
Mark the boundary with a pencil and a spirit level or laser. Use consistent measurements from a fixed reference such as skirting or a door frame. Snap a faint chalk line if the span is long. Apply tape with short overlaps rather than one long stretch. Do not pull it tight; lay it gently, then press.
Burnish the edge. Run a plastic card or a silicone squeegee along the paint-side edge with even pressure. This closes micro-gaps that thin paint loves. Work in 1 m sections so you can check for bubbles and dust.
Lock the edge: brush a thin pass of the underlying wall colour along the tape. Let it flash off for 10–20 minutes. Then apply the new colour.
Application technique and the wet-release moment
Load, roll and cut-in like a pro
Decant paint and stir. Use a quality mini-roller (5–10 mm nap) for the border zone. Keep the roller moist, not dripping. Roll away from the tape first, then back towards it with light pressure. Two thin coats beat one heavy one. Leave the first coat to dry as per tin guidance, usually 2–4 hours for acrylic emulsions at 18–22°C and 40–60% humidity.
If the day is warm or the room is dry, add 5–10% clean water to acrylic wall paint to improve flow. Keep a wet edge by working in manageable sections. Avoid flooding the corner; paint finds gravity and will creep under tape if you overload it.
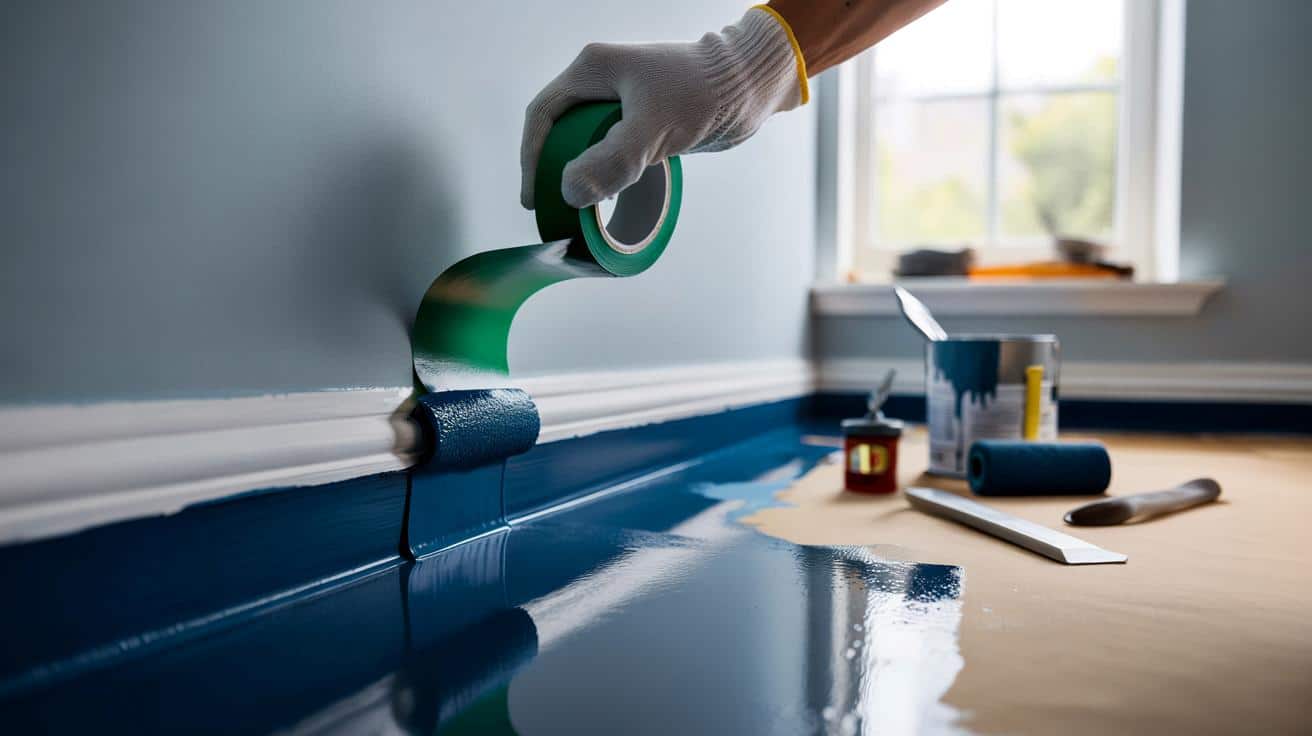
When to pull the tape
Timing drives the result. Remove the tape while the final coat is still fresh on the surface. This usually means 5–15 minutes after the last pass, before a full skin forms.
Peel back on itself at 30–45 degrees, moving slowly and steadily. If you meet resistance, pause and score the edge lightly with a sharp knife to release the paint film.
Hold the free end low. Keep the peel angle consistent. Drop the used tape straight into a bag to avoid smudges. If a whisker of colour remains on the wrong side, touch it with a small artist’s brush once both colours have dried.
Seven-step checklist for razor-sharp edges
- Wash, fill and sand. Wipe down with a damp microfibre cloth. Let the wall dry fully.
- Prime porous patches so tape will stick evenly and remove cleanly.
- Measure, mark and level your line. Check from multiple vantage points.
- Lay quality tape in short runs. Overlap joins by 5–10 mm. Burnish the paint-side edge.
- Seal the edge with the base colour or a clear matte sealer on textured walls.
- Apply two thin coats of the new colour. Keep pressure light near the tape.
- Peel the tape while the paint is still fresh. Score if the film tugs.
What if the wall is textured, old or damp?
Light texture: use an elastic tape and a clear, water-based matte sealer to pre-coat the edge. This fills micro-voids without tinting. Heavier texture: consider a narrow trim batten as a mechanical guide and paint up to it, or install a slim timber bead to create a permanent divide.
Old paint: test for adhesion. If the base lifts with low-tack tape, the wall needs a binding primer. Brittle gloss around door frames often needs a key with 240-grit followed by a degrease. For homes built before the 1960s, treat sanding with care due to possible lead in old coatings. Use wet-sanding and a proper mask.
Damp corners: moisture traps behind wardrobes and in cold external corners can slow drying and lead to tearing when you pull tape. Ventilate. Aim for 40–60% relative humidity and a room temperature between 10–25°C. A fan helps move air across the surface.
Costs, time and a quick room plan
A 50 m roll of decent masking tape runs at roughly £3–£8 depending on type. A small silicone squeegee is around £5–£10. A mini-roller and tray set adds £4–£12. For a standard wall edge of 3.6 m, plan 45–90 minutes including marking, taping, two coats and the wet pull, assuming the base colour is already dry.
Plan the sequence when using multiple colours. Start with the lightest shade across the largest area. Let it cure at least 24 hours. Tape for the darker shade second. This order reduces show-through and makes edge repairs easier if needed.
Colour pairings that flatter real homes
Deep navy against soft white brightens north-facing rooms. Sage with warm grey calms busy spaces. Clay pink against stone reads warm under LED light. Keep the dominant colour at about 60%, a secondary at 30% and an accent at 10%. Place the boundary where sightlines meet: above a dado, at the top of panelling, or aligned with window heads.
The sharp line is not only decoration. It is a tool: it stretches walls, frames views and sets a rhythm for furniture and art.
For tricky corners and ceiling junctions, swap to a top-quality angled brush for the final 5 cm. Offload most paint on a scrap board, then feather the stroke towards the tape. This keeps the line tight without pushing liquid under the edge.
If adhesive residue remains after removal, wait until the paint cures fully. Soften residue with warm soapy water and a soft cloth, or a little isopropyl on a cotton bud for gloss trims. Test first in a discreet spot.
Want to simulate the effect before you commit? Mask a temporary band 30–40 cm wide at the intended height. Paint a test strip with sample pots and live with it for 48 hours. Check it in morning light and under evening lamps. Adjust the line up or down by 2–3 cm if the proportions feel off.
Low-odour, low-VOC paints make this process friendlier for busy homes. They skin faster in dry rooms, which makes the wet-release window tighter. Keep tools ready. Peel on time. The crisp junction you reveal will carry the scheme and make even modest rooms feel poised.