You do not need to strip a whole wall to fix a brittle ring of plasterboard around a socket. A clean, local patch can restore strength and a seamless finish. Power off first, then work small, smart and safe. Here is how to spot the real problem, pick the right repair, and keep the bill low.
What you’re really seeing around that cracked socket
Not every mark points to structural trouble. Flaking paint, a skim chip, or a hairline crack can be cosmetic. Widespread crumbling, soft edges that dent under a fingernail, or a socket that “floats” when you touch it signal a weakened board. Scorching, a burnt smell or discoloured terminals point to an electrical fault, not a decorating issue. Damp patches suggest a moisture source that will keep ruining repairs until treated.
Cut power at the consumer unit and prove dead with a tester before you touch the faceplate, tools or wall.
If the faceplate feels loose, remove it after isolating the circuit. Check for stripped screw threads on the back box, broken lugs, or cracked board around the cut-out. Frayed insulation, heat damage or mystery wiring changes warrant an electrician. If the back box itself wobbles in the wall, plan to stabilise it before finishing the surface.
Tools and prep that keep dust, risk and costs down
- Plasterboard saw or a sharp utility knife and a metal straightedge
- Pencil, tape measure, and masking tape for tidy lines
- Scraper, jointing knife, and fine sanding block
- Offcut of 12.5 mm plasterboard or a small repair patch
- Joint compound and either paper tape or self‑adhesive mesh
- Repair washers or timber batten if extra support is needed
- Vacuum, dust sheet, safety glasses and gloves
- Screwdriver to remove and refit the faceplate
Mark a neat rectangle around the damage that stays clear of the back box and safe cable zones.
Lay a dust sheet. Tape a perimeter to reduce flaking. Score the lines lightly before cutting deeper. Work slowly around the socket. Keep cables visible and untouched.
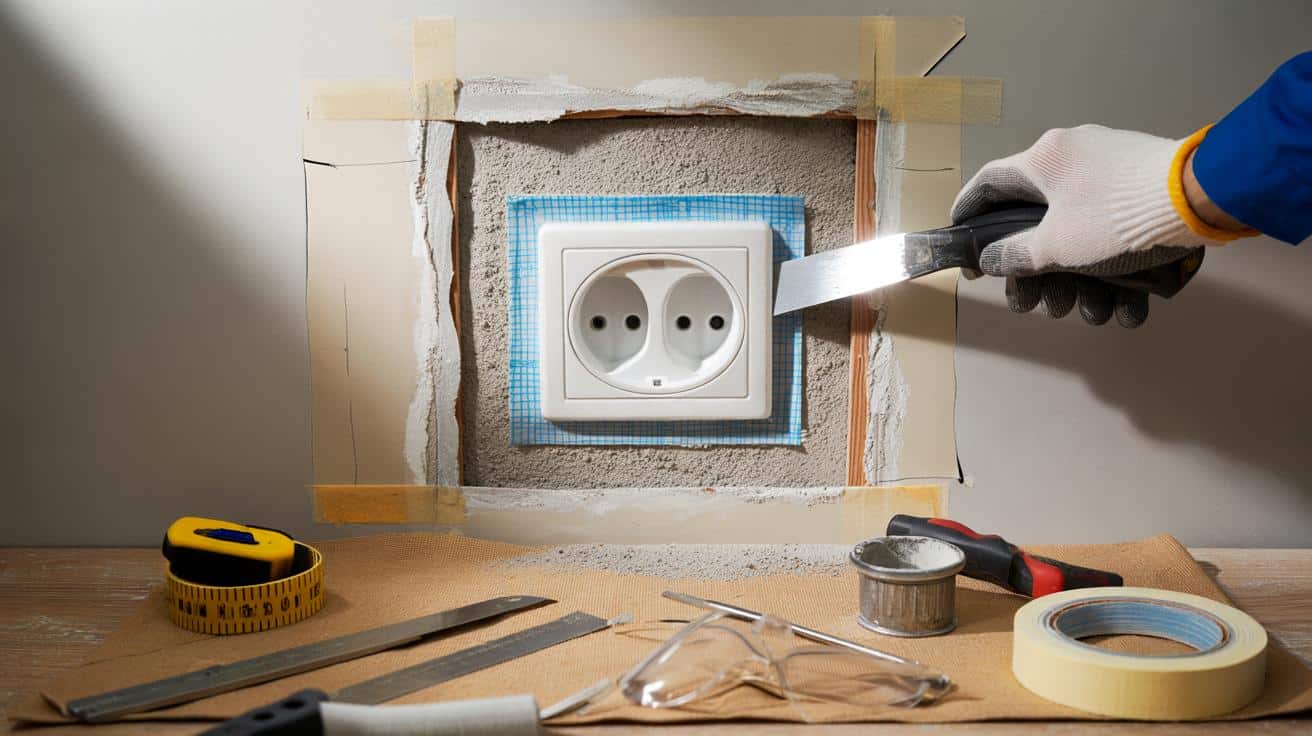
The clean cut‑and‑patch method
Score and remove the weak plasterboard
Trace a square or rectangle that encloses all the crumbled edges. Cut along the lines and lift out the piece. Vacuum the cavity. Test the remaining edges. If they flake, cut back further until you reach firm, crisp material.
Repairs last when you cut back to sound board, not when you smear filler over crumbs.
Make a tight patch
Use the removed piece as a template or measure the opening. Transfer measurements to a fresh offcut. Cut the new piece slightly oversize, then shave to a snug fit. Where the opening lacks support, screw a short timber batten inside the cavity so it bridges the gap. Fix the patch to the batten with two small screws. Keep screws shy of the surface.
Bed, tape and blend
Apply joint compound around the patch. Set paper tape or mesh over the seams. Press out air. Add a thin coat to cover the tape. Feather edges 80–120 mm into the existing wall. Let it dry. Apply a second coat, wider again, to lose the ridge. A third skim blends everything on textured or harshly lit walls.
Sand and paint
Sand lightly until smooth. Vacuum dust. Prime patched areas with a sealer so the topcoat matches the rest. Finish with two coats of your wall paint. Refit the faceplate gently. Nip the screws, do not wrench them tight.
When a quick fix beats a full reboard
| Problem | What works | Typical time | Indicative cost |
|---|---|---|---|
| Hairline cracks and chips | Scrape loose paint, fill, sand, spot prime | 1–2 hours plus drying | £5–£12 |
| Crumbled edge 30–80 mm around socket | Cut‑out and tight plasterboard patch with tape | 2–3 hours over two days | £12–£20 |
| Loose back box but sound board | Replace box, use cavity box clamps or repair lugs | 1–2 hours | £8–£18 |
Common mistakes that wreck the repair
- Over‑tightening faceplate screws. It crushes the board and starts a new crack.
- Skipping a primer. Unprimed patches flash through paint and look dull.
- Leaving dust in the joint. Dust weakens adhesion and causes pinholes.
- Too thick a first coat. Thick compound shrinks and telegraphs the patch edge.
- Cutting too tight to the back box. You risk nicking a cable and you lose support.
- Using filler alone on a large hole. It slumps and fails under the socket’s pressure.
What to check before you close up
Faceplate sits flat and square. No rock when pressed. Back box screws bite cleanly. No gap larger than a coin between socket and wall. RCD protection present on the circuit. No visible damp or salt crusts. If anything fails that checklist, pause and fix the underlying cause.
Safety, regs and when you should step back
UK cable safe zones run horizontally and vertically from accessories. Keep cuts shallow near a socket and stay within those zones. If you replace a back box or alter wiring, follow BS 7671. Upgrading, extending or adding sockets can be notifiable under Part P. If you see heat damage, hear arcing, or find aluminium conductors, call a qualified electrician. Test the circuit’s RCD after refitting. Label the consumer unit if you find any oddities for a pro to assess.
Cosmetic repairs are fine for confident DIYers. Electrical faults, moisture intrusion and box replacements belong to a qualified professional.
Smart extras that make the fix last
Fit a deeper dry‑lining box if the original is flush with crumbly board; it spreads load and reduces faceplate stress. Add a rigid cover plate with a slightly larger bezel if the previous one left ragged paint lines. In busy households, a slimline socket with soft edges helps resist knocks from vacuums and furniture.
Where humidity bites, use a stain‑blocking primer over the patch once the source of moisture is resolved. In kitchens or corridors, consider a tougher acrylic wall paint around sockets for easier cleaning. If the wall is on a partition that flexes, paper tape over mesh adds strength and reduces future hairlines.
A quick decision guide for your weekend
- If the socket moves: stabilise or replace the back box before any plasterboard work.
- If only paint is flaking: fill, sand, prime, and paint — no cutting required.
- If the board crumbles: cut, patch, tape, skim and paint for a durable, neat result.
- If you see heat or damp: stop, diagnose the cause, and bring in the right specialist.
Budget check and time planning
A small patch uses a board offcut, half a tub of compound, a roll of tape and sandpaper. Expect £15–£25 if you own basic tools. Drying time, not labour, sets the pace. Plan two short sessions over two days. Keep one evening free for sanding and painting so the room is back in action by Sunday night.