A tiny tweak can still calm the air, lift comfort, and spare your wallet.
You feel it before you see it. A thin ribbon of cold slips under the door, brushes your ankles, and steals warmth from the room. One small roll of self-adhesive weatherstrip, fitted in minutes, can change the way your home feels tonight, without meddling with the boiler or the thermostat.
Why an £8 strip changes how warm you feel
Draughts act like a conveyor belt for heat. They carry away the air you have paid to warm and drag in cold replacement air. Your body also registers air speed and the temperature of surrounding surfaces, not just the digits on a screen. Seal the gap and two things happen. The indoor breeze drops. The average temperature of walls, windows and floors feels gentler. That shift often nudges the perceived temperature up by 1 to 3°C, even if the measured figure rises by only 0.5 to 1.5°C.
Air leakage can swallow 10–20% of a home’s heat. Plugging obvious gaps curbs the waste before you touch the controls.
Think of it as removing a hidden fan. The radiator has less work to do. Your boiler or heat pump cycles less often. The room grows quieter, the curtains stop twitching, and the cold edge at floor level fades. All from a roll usually priced between €5 and €9, roughly £5 to £8.
The physics behind a draught
Cold air drops, warm air rises, and pressure differences push air through the smallest cracks. That movement cools skin and strips heat from surfaces. By closing the path with foam, EPDM or silicone weatherstrip, you reduce the convective loop. That boosts the mean radiant temperature around you, which your body reads as comfort.
Seal the full loop, corners included. A gap the size of a matchstick leaks like a zip left open.
How to fit it in 10 minutes
No drills, no mess, no contractor. You need a roll of self-adhesive weatherstrip, scissors or a cutter, a cloth and a splash of alcohol for cleaning.
Step by step without tools
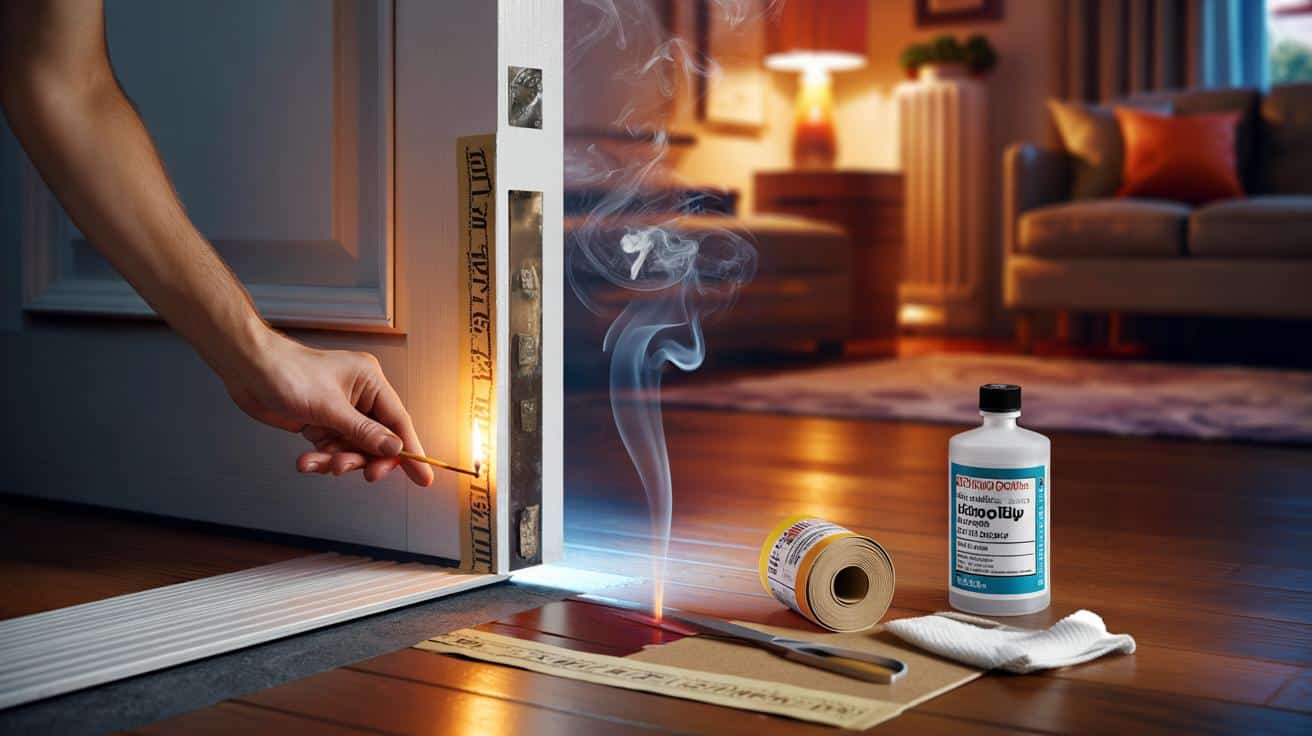
- Find the leak: hold a lit incense stick, match, or thin tissue near frames and the bottom of doors. Watch for smoke or paper trembling.
- Prep the surface: wipe wood, PVC or metal. Remove dust and grease so the adhesive sticks for months, not days.
- Choose the size: foam works for fine gaps; use thicker “D” or “P” profiles where the daylight shows.
- Apply gently: run the strip around the frame at closing points. Don’t squash it flat. Press for a few seconds.
- Mind the corners: overlap or butt-join cleanly to avoid pinholes where air loves to sneak.
- Test the close: shut the window or door. It should latch without force. If it binds, step down a thickness.
A warm room helps the adhesive grab. If the frame feels cold to the touch, warm it briefly with a hairdryer, then stick. For doors that already rub, fit a brush or magnetic draught excluder at the bottom rather than oversizing the frame seal.
What to buy for under €10
| Material | Best for gaps | Durability | Typical length per roll | Notes |
|---|---|---|---|---|
| Foam (self-adhesive) | Fine, even gaps on windows | 1–2 seasons | 6–15 m | Cheap, easy to fit, compresses easily |
| EPDM rubber | Medium gaps on doors and older frames | 3–5 seasons | 6–10 m | Resilient, good rebound, better seal over time |
| Silicone strip | Uneven or larger gaps | 3–5 seasons | 5–8 m | Flexible, adheres well, often pricier but still under €10 in short rolls |
Expect to pay €5–€9 for a standard roll. Most packs cover several window sashes or a door and a window, depending on profile size.
Breathe better while sealing leaks
Seal the sneaky leaks, not your lungs. Keep background ventilation working and refresh the air decisively. Open windows wide for 5–10 minutes once or twice a day, then close. That purge removes moisture, trims condensation risk, and helps the same 19°C feel friendlier than a muggy 21°C.
Dry air at 19°C usually feels warmer than humid air at 21°C, because moisture slows heat loss from skin.
Do not block trickle vents or mechanical extract in kitchens and bathrooms. If you use fuel-burning appliances, follow safety guidance about ventilation and carbon monoxide alarms. The goal is to stop uncontrolled draughts, not to eliminate fresh air.
Small gaps to hunt next
- Letterboxes, keyholes and the gap under front doors: fit a brush, flap or weighted draught sausage.
- Skirting board and floorboard cracks: fill with flexible caulk to stop cold eddies at ankle level.
- Socket plates on external walls: use foam gaskets behind covers to tame micro-leaks.
- Loft hatches and meter cupboards: seal the frame; add a compressible strip around the lid.
- Old sash windows: combine thin foam on meeting rails with a heavier “D” profile at the sides.
Each fix is small. Together, they change the acoustic and thermal character of a room. Heating systems run smoother, with longer cycles and less stop–start wear.
Common mistakes and easy fixes
Pressing the strip flat prevents the frame from closing, while leaving a gap invites the draught right back. Aim for light compression. Dust kills adhesive within days, so clean first. If a strip peels after a cold snap, replace the length rather than patching. Renters can lift foam gently with a plastic scraper and citrus cleaner when they move out, leaving no trace.
A quick reality check on gains and savings
No roll of foam transforms a leaky house into a new build. It addresses the obvious waste that many overlook. If infiltration makes up 10–20% of your heat loss, trimming even half of that can matter. On a £120 winter month of gas or electricity, a 5–10% reduction yields £6–£12 back, month after month, for the cost of a takeaway coffee.
Comfort often jumps first. A sofa by a once‑leaky window feels usable again. Children can play on the rug without cold ankles. The shift is practical and immediate, which is why many households start with one window, test for 24 hours, then work around the rest.
Choosing the right profile and sizing gaps
Measure the daylight. Slide a strip of card between frame and sash to gauge thickness. If you can see light, start with a “D” or “P” profile. If the card drags, foam will do. Avoid stacking more than two layers; step up one profile instead. For sliding doors and windows, use thin, low‑friction seals to keep the glide.
Final pointers to stretch results further
Pair seals with thick curtains at night to lift radiant comfort near glazing. Add a door brush to the coldest threshold. If you run a heat pump, the steadier conditions after sealing often allow a lower flow temperature, shaving a few more pounds off bills. Keep a small notebook of what you sealed and when; revisit in autumn to replace any tired foam before the first frost.
Want a simple test? Take a room thermometer and note the sofa‑level reading and how your skin feels. Fit a single window and a door. Re‑check after two hours on a similar day. If you gain at least 0.5°C at seat height and lose that ankle chill, repeat around the rest of the room. The smallest, cheapest roll on the receipt might end up the one that made winter feel shorter.