One last autumn job could shape your spring kitchen in quiet, delicious ways.
Across the country, gardeners are racing a ticking clock. A small, aromatic bulb promises fragrance, depth and a generous spring lift for simple meals. The catch is timing. Put it in before cold, waterlogged soil locks growth, and the payoff can be striking by late April or May.
Last chance window for grey shallots
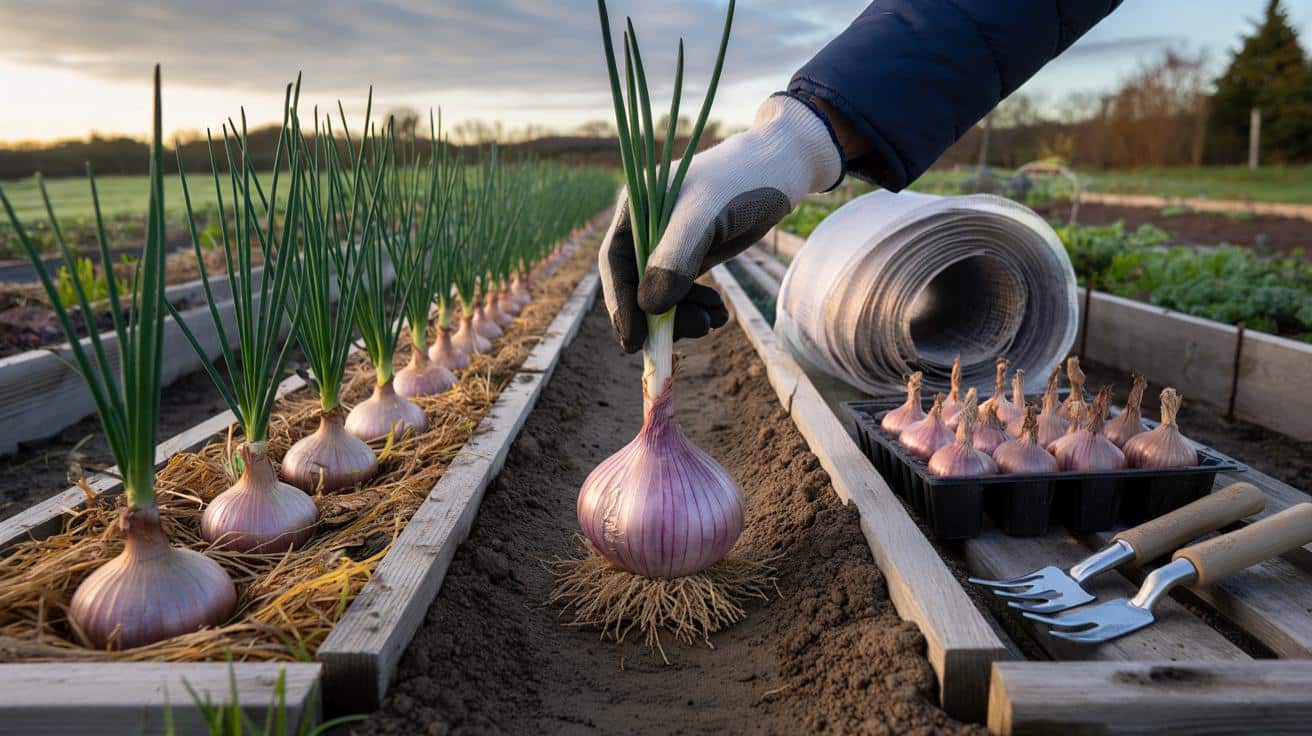
The grey shallot, prized for a refined, savoury bite, needs an early start. Late October still offers a narrow window in much of the UK and similar climates. Plant while the soil holds a trace of warmth, then let winter do its quiet work. Wait two more weeks and you risk sluggish roots, stalled growth and a smaller harvest.
Plant within the next week while soil remains workable and above 7°C; this brief head start sets the crop up for spring.
Grey shallots root slowly compared with other alliums. A modest rise in soil temperature in March triggers new leaves, which pull hard on the root system formed in autumn. That forward planning brings a spring harvest when the herb patch still looks sparse.
Why grey shallots win on flavour and value
Aromatic depth that lifts everyday food
Grey shallots carry a silver-tinted skin with violet flashes and a scent that is sharper and more complex than red or pink types. Raw, they cut cleanly through cream sauces, vinaigrettes and salads. Cooked, they melt into roasts and slow braises, adding gentle sweetness and a whisper of earthiness. They are rarely seen in supermarkets, which pushes many cooks to grow their own.
Numbers that make sense for small spaces
With tight spacing, even a compact bed pays back. Aim for 10–15 cm between bulbs and 25–30 cm between rows. On a 10 m² plot, that equates to roughly 200–250 planted sets. With modest conditions, a cautious benchmark is 0.5 kg per m² by May. That’s a practical 5 kg target from a small bed, with higher yields possible under ideal drainage and disease-free stock.
Soil, siting and bed preparation
Drainage first, then sunlight
Winter wet, not winter cold, is the main threat. Choose a sunny patch that sheds water quickly. On clay, raise the bed by 10–15 cm and lighten it with sharp sand and well-rotted compost. Avoid fresh manure this season, as lush growth invites disease and soft tissue that rots.
Aim for a pH between 6.0 and 7.0. If acidity bites, a light dressing of garden lime can steady the profile for alliums. Remove perennial weeds now; roots left in place compete with slow-establishing bulbs.
Planting method that saves the crop
Depth, spacing and direction
Set each bulb 2–3 cm deep, point up; space 10–15 cm apart with 25–30 cm between rows. Firm the soil and leave it at that.
Do not flood the bed after planting if rain is forecast. A light firming with the palm ensures good soil contact. In a dry spell, a gentle watering helps, but only enough to settle the soil.
Mistakes that cost you weeks
- Planting too deep, which slows emergence and weakens small bulbs.
- Choosing shade, which encourages disease and soft growth.
- Ignoring drainage; standing water causes rot in cold spells.
- Snapping the tip; the growing point sits just under the skin.
- Using uncertified sets; hidden disease can wipe out a bed.
Aftercare through winter and early spring
Light protection without suffocation
A thin mulch of chopped leaves or clean straw buffers temperature swings and reduces soil splash. Keep it airy to prevent rot. In harsher districts, drape fleece or a light winter veil during cold snaps and lift it during mild spells to prevent condensation and fungal issues.
Weeding, feeding and water
Weeds steal winter light and spring nutrients. Hand-weed carefully once a month on frost-free days. Grey shallots dislike heavy nitrogen. If growth looks pale in March, apply a small top-up of a balanced, low-nitrogen fertiliser. Water sparingly from late March if the top 5 cm of soil dries out, then stop as bulbs begin to swell.
Calendar at a glance
| Month | Task | Target conditions |
|---|---|---|
| Late Oct | Plant sets shallow; firm soil; light mulch | Soil above 7°C, free-draining |
| Nov–Feb | Keep bed tidy; protect in hard frost; avoid waterlogging | Mulch breathable, no standing water |
| Mar | Remove fleece; light feed if needed; gentle watering | Soil workable; new shoots 5–10 cm |
| Late Apr–May | Harvest when tops yellow and fold; cure bulbs | Dry spell preferred for lifting |
Reading the crop and picking the moment
Signs of healthy progress
By late winter, new, bright-green leaves indicate strong roots beneath. Brown tips often point to wind scorch or cold nips. Limp, pale foliage can mean compacted soil or too much water. Loosen the surface and ease off the hose.
Harvest timing and storage
Lift when most leaves yellow and collapse. Choose a dry day to avoid mud sealing the necks. Brush off soil and cure the bulbs for 10–14 days in a shaded, airy shed. Store at 5–15°C with moderate humidity and good airflow. Properly cured grey shallots hold their aroma for months.
Kitchen uses that justify the space
Raw bite and slow sweetness
Finely sliced grey shallots sharpen a mustard vinaigrette, lift a tomato salad and cut through rich pâtés. Roasted whole beside chicken or cod, they soften into jammy sweetness. Stir into pan sauces, fold through butter for grilled steaks, or tuck under pastry in a tart tatin.
Extra guidance for better odds
Rotation, pests and disease
Keep a four- to six-year gap between alliums in the same bed to limit white rot, which can persist in soil for years. Watch for onion fly; a fine mesh over the rows from March helps. Rust appears as orange pustules in damp springs; improve airflow and avoid overhead watering.
Small-space and container setups
Use a 30–40 cm deep crate with drainage holes. Fill with a sandy loam mix, then plant sets 12 cm apart. Keep the box under cover in very wet spells and move it into full sun on dry days. Expect a modest yield, but the flavour pays back the effort.
What to budget and what to expect
Certified grey shallot sets can be harder to source than standard types. Expect to pay a little more per kilogram. For a 10 m² bed, 1.5–2.0 kg of sets usually suffices. With good drainage, clean planting material and a timely start, a first-season target of 5 kg by May is realistic, with scope to improve next year.
Miss the October slot and growth slows. Hit it, and you bank a fragrant, early harvest when fresh produce is still scarce.
For keener cooks, one extra gain sits in the kitchen bin: save the papery skins for stocks and broths, where they lend colour and a delicate, savoury thread. For the garden, try companioning with carrots or beetroot in adjacent rows to spread risk and stagger harvests. Add a quick salad leaf sowing in March between rows; it matures before bulbs swell, making smart use of light and space.
If spring sprints warm, bring harvest forward by a week and cure in cooler shade. If a soggy winter looms, build low ridges now to lift crowns above wetness. Simple moves like these lock in margins, and in a crop as fine-textured as grey shallots, margins matter.