Wall damage, dust and deposits loom. A quieter solution beckons tenants.
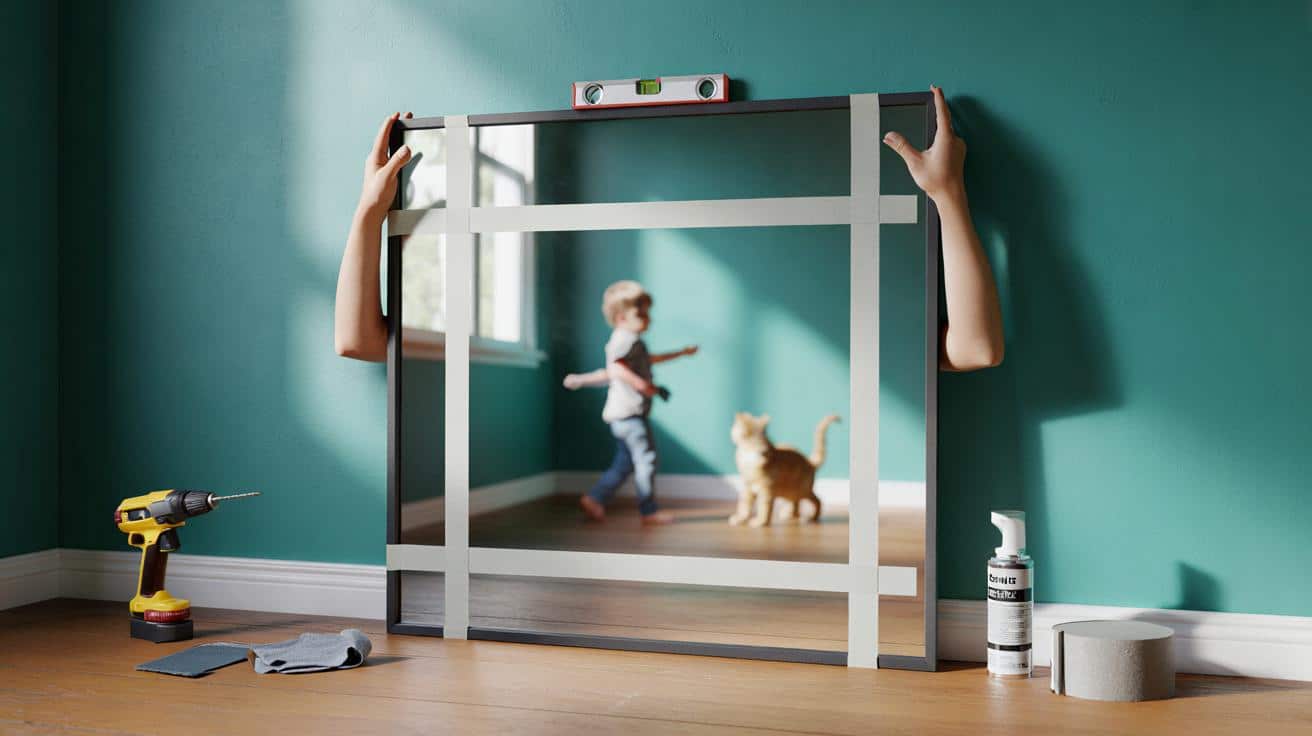
Across Britain’s rented flats and busy family homes, a new weekend project is taking hold: mounting weighty mirrors without picking up a drill. Hardware aisles now brim with industrial double‑sided tapes that promise serious grip. Used correctly, they keep glass stable, rooms brighter and deposits intact.
Why no-drill mirror mounting is gaining ground
Drilling into plasterboard, old brick or crumbly skim invites trouble. You raise dust, risk pipes and cables, and leave scars that need filler and paint. Tenants then face awkward end‑of‑tenancy chats and surprise redecorating costs.
There is a second concern: safety. A heavy mirror that creeps or fails turns into a dropping hazard for children, pets and flooring. Choosing a method that resists daily knocks matters more than a tidy finish.
A falling 8 kg mirror is not just broken glass; it is kinetic energy near faces, paws and hardwood floors.
The tape method: what actually holds the weight
Modern double‑sided mounting tapes rely on high‑tack acrylic adhesives that form a strong bond once pressed and allowed to cure. They excel in shear (weight sliding down a wall) when you spread load across enough surface area. The packaging lists a maximum load per strip length; treat that figure as a ceiling, not a target.
How to pick the right product
- Width and thickness: aim for strips at least 20 mm wide to spread stress and improve shear resistance.
- Load rating: check the stated kilogramme capacity per strip or per 10 cm. Add a safety margin of 30–50 per cent.
- Surface match: look for tapes labelled for mirrors or “heavy objects” and compatible with painted walls, glass, tile or sealed wood.
- Avoid: dusty plaster, flaking paint, textured render, bare brick and damp zones where adhesion drops fast.
For a 7–10 kg mirror, plan to share the load across several strips instead of trusting one or two “hero” pieces.
Preparation that makes or breaks the install
Tape only sticks as well as the surface allows. Skin oils, kitchen vapour and fine dust act like tiny ball bearings. Clean with purpose and you remove the bond’s worst enemies.
Clean like a pro, then wait
- Dust both wall and mirror back with a dry, lint‑free cloth.
- Degrease using isopropyl alcohol or a mild alcohol‑based cleaner. Avoid soapy residues.
- Let both surfaces dry fully. Moisture locked in will force a slow peel later.
- Check for flatness. A smooth, level backing plate on the mirror spreads pressure evenly.
The step‑by‑step fit you can repeat
Plan, measure, then commit. A careful layout keeps the glass square and the load balanced.
- Mark a light pencil line on the wall using a spirit level.
- Apply strips around the mirror’s perimeter and add a cross or ladder of strips across the centre to tie the structure together.
- As a rule of thumb, use roughly 10–15 cm of tape per kilogramme of mirror, distributed evenly.
- Peel liners, align to your level mark and press firmly from top to bottom, then side to side.
- Maintain hard pressure for at least 30 seconds per contact zone to kick‑start the bond.
- Leave the mirror undisturbed for a curing period. Many manufacturers suggest 24 hours for near‑full strength; longer in cool rooms.
| Mirror weight | Minimum total tape length | Suggested layout |
|---|---|---|
| 4 kg | 40–60 cm | Perimeter strips plus one short centre strip |
| 6 kg | 60–90 cm | Perimeter strips plus one full vertical centre strip |
| 8 kg | 80–120 cm | Perimeter strips plus a vertical and horizontal cross |
| 10 kg | 100–150 cm | Dense perimeter strips plus two internal crosses |
Where this works brilliantly, and where it does not
Living rooms, hallways and bedrooms suit tape‑mounted mirrors well, especially on painted plasterboard, primed wood or tile. Kitchens and bathrooms raise the bar. Steam cycles, daily temperature swings and cleaning sprays weaken bonds.
Bathrooms and kitchens: manage the moisture
- Choose a wall away from direct steam paths and not above a radiator.
- Ventilate regularly. Keep relative humidity moderate to protect the adhesive.
- Wipe condensation promptly from mirror edges to limit creep.
If you can smell steam on the wall, the adhesive can too. Pick a drier spot or switch to a rail or cleat.
Safety checks that keep the mirror up for years
Build a habit of quick inspections every two or three months. Look for a slight tilt, raised corners, or a soft “give” when you press near edges. Small changes whisper before they shout.
- If you spot movement, support the mirror, release it carefully, clean both surfaces again and add tape to increase contact area.
- Keep footballs, door handles and cat routes away from the glass line. Impact, not weight, triggers many failures.
Extra guidance: load maths, removal tricks and alternatives
Think about the forces at play. Adhesive tapes excel in shear, where the weight slides downward along the wall. They struggle with peel, where a corner tries to lift away. That is why edges matter. Keep the perimeter fully supported, and avoid gaps that invite a corner to flick free when the door slams. Work within comfortable conditions: room temperatures between 10–30°C and dry walls help the chemistry bond well.
Need to move the mirror later? Warm the strips gently with a hairdryer to soften the adhesive. Slide dental floss behind the glass in a sawing motion to release it gradually. Roll away residue with your thumb or a citrus‑based remover and clean again before any new mounting.
If your wall is textured, freshly painted, or frequently damp, look at hybrid approaches. A slim top rail bonded with construction adhesive spreads weight over a larger area, while two discreet bottom pads keep the panel stable. Where drilling is unavoidable, two small holes into solid studs combined with modest tape can halve the dust and still protect the wall from scuffs.
Before you start, weigh the mirror, note its size and measure your wall. Sketch your tape pattern and total up strip length against the packaging’s stated capacity. That five‑minute plan reduces risk, saves returns at the shop and gives you confidence when the glass meets the wall.