The bill climbs, the warmth fades, and the culprit hides in plain sight.
As temperatures dip, tiny openings begin to matter. A barely visible slit under the front door can pull heat from every room and push your costs up week after week.
Why the front door steals warmth when the wind picks up
A home leaks where air finds the easiest path. The front door sits on the pressure boundary of the building. Wind pushes on it. Extractor fans and boilers draw air from outside. Warm air rises up stairwells and pulls cold air in at ground level. That is why the entrance feels raw on gusty nights.
Even a new door can leak. A 2–3 mm gap along the threshold acts like a permanent vent. Night-time losses grow when the heating cycles down. The hallway then cools first and chills air flowing into other rooms.
Up to 20% of seasonal heat can vanish through uncontrolled draughts at and around the front door.
The cost piles up between October and March. The boiler works longer to reach the same set-point. Each extra degree demanded by the thermostat multiplies the waste. Renters notice it as a stubborn chill by the doormat. Owners see it on the meter.
Signals you can check in one minute
- Cold ankles near the threshold while the rest of the room feels fine.
- A faint hiss or whistle when wind hits the door slab.
- Daylight peeking under the door or around the frame at dusk.
- Movement of the letterplate flap or keyhole cover during gusts.
- Outside smells drifting in after traffic passes.
- Dust lines or spider webs disturbed along the frame.
Fixes you can fit today with a small outlay
Seal the threshold
A draught-excluding strip at the bottom of the door blocks the longest leak. Brush strips tackle uneven floors. Drop-down seals close tightly as the door shuts. Both install with a saw, a drill, and a tape measure.
- Measure the width of the door leaf. Cut the strip to size with a fine-tooth saw.
- Offer it up so the bristles or rubber just kiss the floor or the threshold.
- Fix with the screws provided. Open and close the door to check for smooth movement.
A £15 brush strip can tame a 3 mm gap that leaks like a permanently open vent.
Add a thermal curtain
A lined curtain behind the door creates a calm air pocket. It slows the draught and softens night-time temperature swings in the hallway. Fit a rail wider than the door frame and let the fabric puddle slightly on the floor. Choose a dense weave for the best effect.
Refresh the seals
Perished door seals flatten and stop gripping. Peel them back and look for cracked foam or shiny compressed sections. Self-adhesive EPDM or tubular rubber seals press into place in minutes. Pick a size that compresses snugly without forcing the latch.
Do not forget the letterplate. A brush-lined inner cowl reduces flapping. A sprung keyhole cover stops a surprising amount of cold air.
Small, neat interventions stacked together beat a single big fix. Seal, curtain, and threshold work as a team.
What you might spend and how fast it pays back
| Measure | Typical cost (£) | Heat loss cut | Indicative payback |
|---|---|---|---|
| Brush or drop-down threshold seal | 12–30 | 5–10% at the door | 1–6 weeks in a windy spot |
| Thermal curtain and rail | 25–70 | 5–15% at the door | First winter |
| Self-adhesive perimeter seals | 8–20 | 5–10% at the door | Weeks |
| Letterplate brush cowl | 10–18 | 2–4% at the door | Weeks to months |
Numbers vary with exposure, floor level, and how the rest of the home performs. The gains stack. A sealed threshold plus a heavy curtain often doubles the improvement compared with one measure on its own.
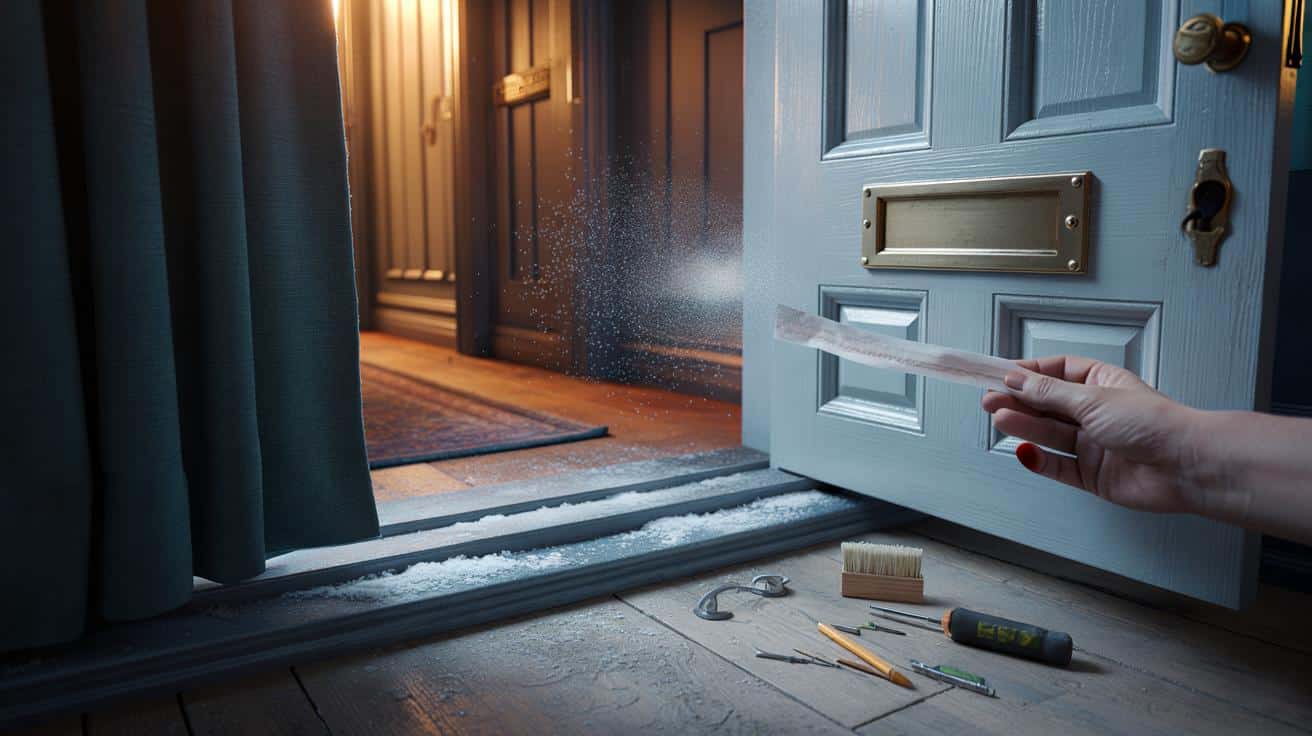
A quick testing routine for a windy evening
- Stand inside with the lights off at dusk. Look for daylight at the edges and under the door.
- Hold a strip of tissue by each suspect gap. Watch for movement when gusts hit.
- Run the back of your hand along the frame and threshold. Skin spots draughts better than gloves.
- Dust the threshold with talc, close the door, and slide a card. If it moves freely, you still have a gap.
- After fitting seals, repeat the same tests to confirm the change.
If you can see it or feel it, your boiler pays for it.
Keep the gains with simple upkeep
Doors drift out of alignment as timber moves and hinges wear. Tighten hinge screws. Lift the latch plate by a millimetre if the handle binds. Lubricate the hinges so the door closes fully every time. Clean grit off the threshold so the new seal beds evenly.
Seasonal checks help. Autumn brings big swings in temperature and humidity. A monthly lap of the entrance with a screwdriver and a cloth keeps seals working and gaps closed.
Renting and worried about damage
Go for reversible gear. Use stick-on EPDM strips, clip-on brush seals, and a tension rod for the curtain. A weighted fabric draught snake along the floor adds a quick barrier. Keep the packaging to show fittings are temporary if you need to move.
What this could mean for your bill
Take a typical gas spend of £900 a year for space heating. If unwanted air change at the door accounts for 10% of that loss, the leak costs around £90 each year. A £20 seal and a £40 curtain can cut that in half or better. That sends £45 or more back to your pocket while the hallway warms up.
Electric heating magnifies the stakes. At higher unit rates, the same leak burns through pounds faster, especially during evening peaks. The fixes above work exactly the same way with panel heaters or heat pumps, and they improve comfort around the thermostat, which trims run time further.
Go one step further if your entrance faces strong wind
Consider a draught lobby if space allows. A second inner door or a glazed screen breaks the gust and captures an extra layer of still air. Fit a low-profile threshold ramp if accessibility matters. Check trickle vents in nearby rooms are open enough to keep fresh air healthy once you seal the entrance more tightly.
Tools and quick wins in ten minutes
- Multi-tool or handsaw to size a brush strip.
- Drill or screwdriver, pencil, and tape measure.
- Sharp scissors for self-adhesive seals.
- Magnetic letterplate liner to stop flapping.
- Door snake for instant floor-level protection before your kit arrives.
Seal the gap, soften the gust, and maintain the latch: three steps that turn a cold entrance into a calm buffer.
If you like numbers, log gas usage for a week before and after the fix while weather stays similar. Note boiler run hours or smart meter half-hourly data. A steady cut in evening consumption signals success. A handheld thermal camera or a smartphone add-on also reveals cold streaks around hinges, frames, and letterplates so you can target the last leaks.
The front door often sets the tone for the entire dwelling. Treat it as a thermal border. Small upgrades here shorten heat pump defrost cycles, soothe chilly stairs, and reduce condensation near skirting boards. Start with the obvious gap you can see. The quickest win usually sits under your feet.